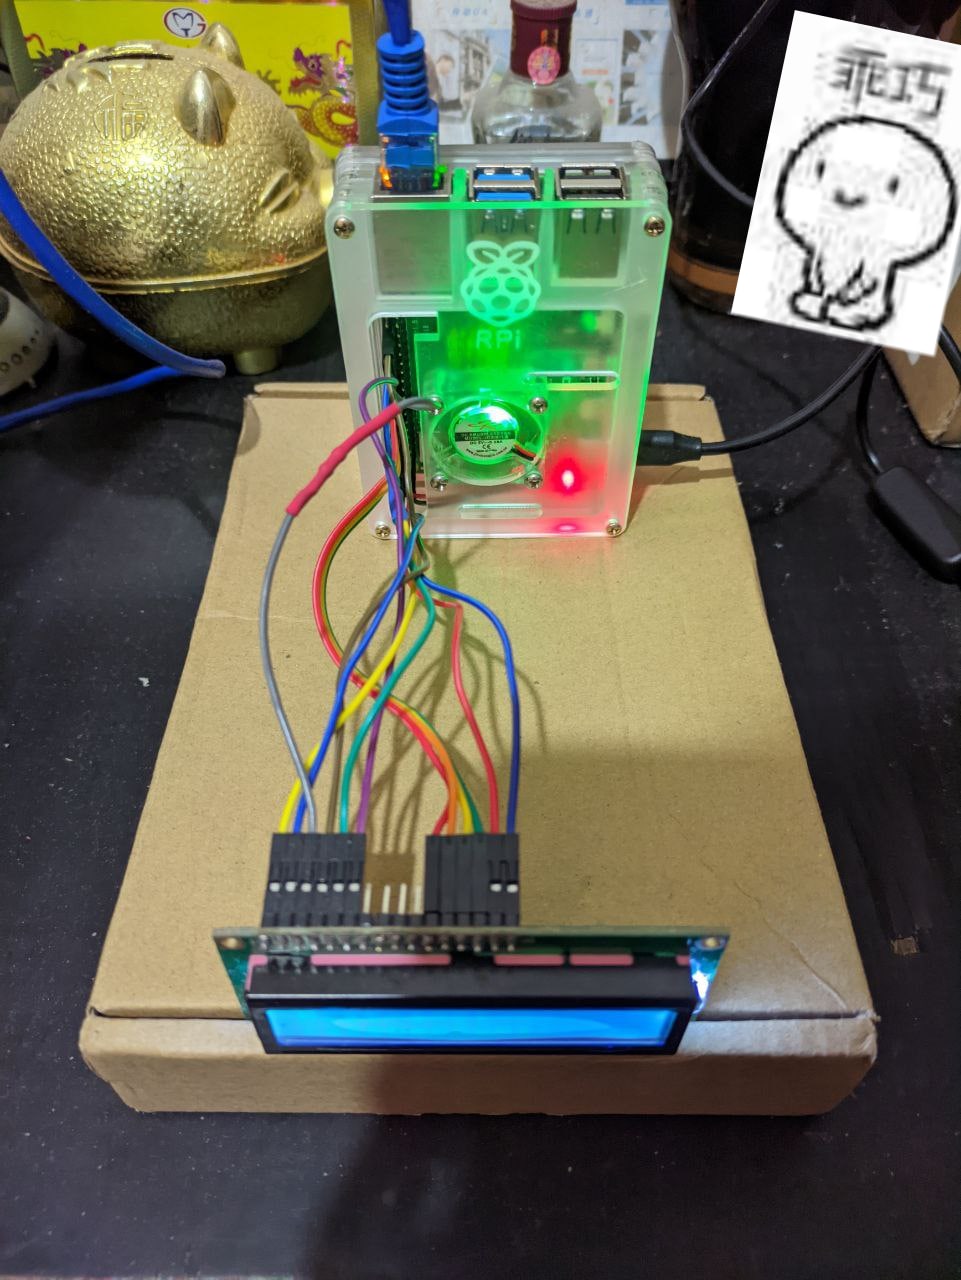
使用 LCD1602 实时显示 RaspberryPi 运行信息
今年7月份时我以一个相对低廉的价格(700¥)入手了RaspberryPi 4B 4GB RAM版,用来7x24小时跑爬虫。
为什么说相对低廉呢?因为两个多月后我之前买的那家店铺已经把4B 4G版裸板涨价到了900+¥(笑)。
到手之后,光是装系统就踩了不少的坑。因为家里没有micro HDMI线,又懒得买,所以只能在没有显示器的情况下完成了系统安装。
把ssh和vnc整好之后,很快就把爬虫部署好了。然后看着这台RaspberryPi,我陷入了茫然,不对,是陷入了回忆。
看着那两排40个GPIO针脚,让我回忆起了大学时代整天摆弄洞洞板、电烙铁、C51单片机、LED灯的时光。
突然想起以前买C51开发板送的有一块LCD1602液晶屏还在那闲置着,那为什么不物尽其用呢?用它显示一些设备运行时的信息,岂不美哉?
说干就干!
编程语言的选择
说实话,控制LCD1602最好是使用C语言或者汇编语言,因为它们跑得比xxxx都快。
但是还有个问题不得不考虑,如果要用LCD1602显示时间或系统各种资源的占用情况,那用C语言怎么获取这些信息?
所以,还是应该使用高级编程语言进行开发。那就选择我最喜欢的Python啦!
引脚与接线
网上查阅资料,很快就找到了一篇很好很详细的博文:树莓派使用Python控制LCD1602模块 — 八色木
准备好若干根母对母的杜邦线之后就可以开搞了。
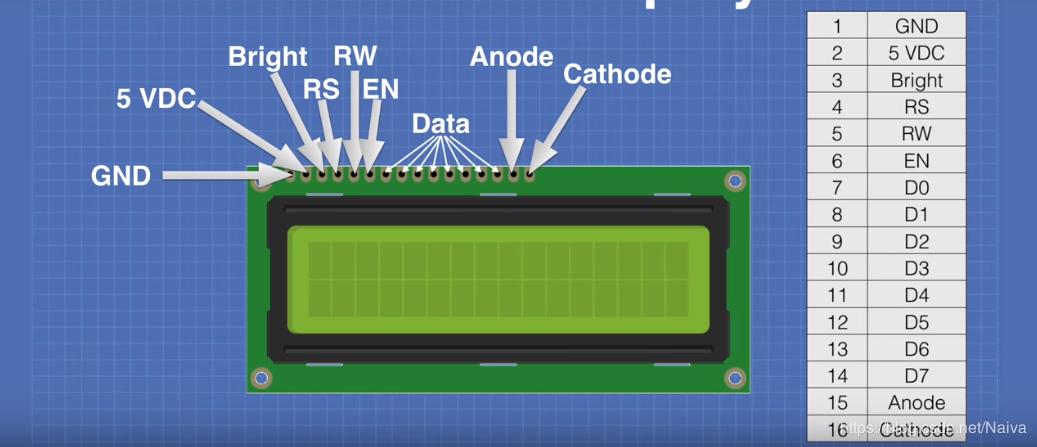
- 1脚:GND,电源地,直接接地。
- 2脚:VCC,电源正极,为液晶屏提供主供电,接到提供5V电压的引脚上。
- 3脚:VO,液晶显示偏压脚,用来控制液晶屏显示的对比度,接地时对比度最高,接正电源时对比度最低。对比度太高或者太低的话,看字符都会很困难。这里将此脚接地,并接上一个10KΩ的电位器用来随时调整对比度,没电位器的话就用各种不同阻值的电阻试一下。
- 4脚:RS,寄存器选择脚,高电平时传数据,低电平时传指令,接到一个普通的GPIO引脚上。
- 5脚:RW,读写选择脚,高电平时进行读操作,低电平时进行写操作,这里我们不需要读取液晶屏上显示的字符,所以直接接地。
- 6脚:E,使能信号脚,当E脚从高电平变为低电平时,液晶屏执行命令,接到一个普通的GPIO引脚上。
- 7~14脚:D0~D7,8位双向数据脚,接到普通的GPIO引脚上。也可以选择使用4 Bits模式,只接D4~D7四个引脚(以下程序都是在使用4 Bits模式的前提下编写的)。
- 15脚:BLA,背光电源正极,3.3v即可,可以接到提供3.3V电压的引脚上,也可以接到一个普通的GPIO引脚上(GPIO引脚能够提供3.3V的电压,这样就可以实现在程序里控制背光开关了)。
- 16脚:BLK,背光电源负极,直接接地。
程序的编写
编写模块
可以参考之前提到的博文里的程序,也可以参考我改写的程序 。
#!/usr/bin/python3

try:
    import RPi.GPIO as GPIO
except ImportError:
    raise ImportError("This doesn't appear to be a Raspberry Pi device!")
import time


# Define GPIO to LCD mapping
LCD_RS = 16
LCD_E  = 12
LCD_D4 = 25
LCD_D5 = 24
LCD_D6 = 23
LCD_D7 = 18

# Define some device constants
LCD_WIDTH = 16  # Maximum characters per line
LCD_DAT = True
LCD_CMD = False

LCD_LINE_1 = 0x80  # LCD RAM address for the 1st line
LCD_LINE_2 = 0xC0  # LCD RAM address for the 2nd line

# Timing constants
E_PULSE = 0.0005
E_DELAY = 0.0005


def lcd_toggle_enable():
    # Toggle enable
    time.sleep(E_DELAY)
    GPIO.output(LCD_E, True)
    time.sleep(E_PULSE)
    GPIO.output(LCD_E, False)
    time.sleep(E_DELAY)

def lcd_byte(bits, mode):
    # Send byte to data pins
    # bits = data
    # mode = True    for character
    #                False for command

    GPIO.output(LCD_RS, mode)  # RS

    # High bits
    GPIO.output(LCD_D4, bits & 0x10 == 0x10)
    GPIO.output(LCD_D5, bits & 0x20 == 0x20)
    GPIO.output(LCD_D6, bits & 0x40 == 0x40)
    GPIO.output(LCD_D7, bits & 0x80 == 0x80)

    # Toggle 'Enable' pin
    lcd_toggle_enable()

    # Low bits
    GPIO.output(LCD_D4, bits & 0x01 == 0x01)
    GPIO.output(LCD_D5, bits & 0x02 == 0x02)
    GPIO.output(LCD_D6, bits & 0x04 == 0x04)
    GPIO.output(LCD_D7, bits & 0x08 == 0x08)

    # Toggle 'Enable' pin
    lcd_toggle_enable()

def lcd_init():
    # Main program block
    GPIO.setwarnings(False)
    GPIO.setmode(GPIO.BCM)        # Use BCM GPIO numbers
    GPIO.setup(LCD_E,  GPIO.OUT)  # E
    GPIO.setup(LCD_RS, GPIO.OUT)  # RS
    GPIO.setup(LCD_D4, GPIO.OUT)  # DB4
    GPIO.setup(LCD_D5, GPIO.OUT)  # DB5
    GPIO.setup(LCD_D6, GPIO.OUT)  # DB6
    GPIO.setup(LCD_D7, GPIO.OUT)  # DB7

    # Initialise display
    lcd_byte(0x33, LCD_CMD)  # 110011 Initialise
    lcd_byte(0x32, LCD_CMD)  # 110010 Initialise
    lcd_byte(0x06, LCD_CMD)  # 000110 Cursor move direction
    lcd_byte(0x0C, LCD_CMD)  # 001100 Display On, Cursor Off, Blink Off
    lcd_byte(0x28, LCD_CMD)  # 101000 Data length, number of lines, font size
    lcd_byte(0x01, LCD_CMD)  # 000001 Clear display
    time.sleep(E_DELAY)

def lcd_string(message: str, line, scrolling=False):
    # Send string to display

    def _lcd_string(_message: str):
        lcd_byte(line, LCD_CMD)
        for j in range(LCD_WIDTH):
            lcd_byte(ord(_message[j]), LCD_DAT)

    message_len = len(message)
    if message_len > LCD_WIDTH and scrolling:
        # 字符串长度大于LCD_WIDTH, 且scrolling为True时, 在同一行"滚动"显示.
        # 注意此时整个程序是阻塞的.
        # 这意味着, 如果你的程序是先显示第一行字符串再显示第二行字符串, 且第一行字符串长度大于LCD_WIDTH,
        # 那么只有第一行字符串滚动完毕了才会开始显示第二行字符串.
        # 此时你应该让你的程序先显示第二行字符串, 再显示第一行,
        # 同时也意味着这个函数尚不支持两行同时滚动.
        for i in range(message_len-LCD_WIDTH+1):
            _lcd_string(message[i:i+LCD_WIDTH])
            # 字符串滚动完之后不再sleep
            if i == message_len - LCD_WIDTH:
                break
            if i == 0:
                time.sleep(1.25)  # 滚动前额外停留1.25秒, 加上下面的0.75秒, 总计停留两秒
            # 每次滚动停留0.75秒 (停留时间太短的话字符串滚动得太快, 导致字符串难以辨识, 而且很费眼睛)
            time.sleep(0.75)
    else:
        message = message.ljust(LCD_WIDTH, " ")
        _lcd_string(message)

# https://github.com/T-622/RPI-PICO-I2C-LCD/blob/997b35940bda3addb473dea38c6c10e3cf48855c/lcd_api.py#L153
def lcd_custom_char(location, charmap):
    # Write a character to one of the 8 CGRAM locations,
    # available as chr(0) through chr(7).
    location &= 0x7
    lcd_byte(0x40 | (location << 3), LCD_CMD)
    time.sleep(E_DELAY)
    for i in range(8):
        lcd_byte(charmap[i], LCD_DAT)
        time.sleep(E_DELAY)

def lcd_cleanup():
    lcd_byte(0x01, LCD_CMD)
    lcd_string("Goodbye!", LCD_LINE_1)
    GPIO.cleanup()
LCD_RS LCD_E LCD_D4 LCD_D5 LCD_D6 LCD_D7这些常量应该根据自己实际接的GPIO引脚编号进行定义。
保存为lcd1602.py文件,作为Python模块供其他Python程序调用。
实际使用到的只有4个函数:
lcd_init:初始化液晶屏。lcd_string:写入字符串:- 第一个参数是要写入的字符串;
- 第二个参数是要写入第几行(
LCD_LINE_1:写入第一行,LCD_LINE_2:写入第二行); - 第三个参数为真值时,长度大于16的字符串会在所在行滚动显示。
lcd_custom_char:自定义字符,具体请自行查阅相关资料。lcd_cleanup:清理,最好在程序结束时调用一下。
试一下让LCD1602显示Hello world。
from lcd1602 import lcd_init, lcd_string, LCD_LINE_1

lcd_init()

lcd_string("Hello world!", LCD_LINE_1)
当然你不可能只让它显示Hello world,接下来编写我们自己的程序。
编写程序
首先我们先考虑下有哪些需求:
- 设备的一些基本信息(型号、修订版本、制造商、bootloader版本、内核版本等等)
- 时间、开机时长
- CPU占用率、温度
- RAM占用率
- 磁盘占用率
- 主机名
- IP地址
时间的话,用Python标准库中的datetime库就可以搞定。
设备的基本信息,可以通过Python内置库中的gpiozero.pins.data.pi_info函数获取:
In [1]: from gpiozero.pins.data import pi_info

In [2]: pi_info()
Out[2]: PiBoardInfo(revision='c03115', model='4B', pcb_revision='1.5', released='2019Q2', soc='BCM2711', manufacturer='Sony', memory=4096, storage='MicroSD', usb=4, usb3=2, ethernet=1, eth_speed=1000, wifi=True, bluetooth=True, csi=1, dsi=1, headers=..., board=...)
bootloader版本,可以调用vcgencmd bootloader_version命令获取:
pi@raspberrypi:~ $ vcgencmd bootloader_version
2022/09/02 15:10:12
version 0b3f4b5e0e9994e7c7e4b2a793d5d9b11047f982 (release)
timestamp 1662127812
update-time 1662183585
capabilities 0x0000007f
内核版本,没啥好说的,cat /proc/version。
主机名,也没啥好说的,cat /etc/hostname。
CPU温度,cat /sys/class/thermal/thermal_zone0/temp。
其他的那些信息(开机时长、CPU占用、RAM占用、磁盘占用、IP地址),只需要一个第三方库psutil就可以搞定。
然后,就可以把程序写出来了:
#!/usr/bin/python3
import time
import datetime
import subprocess
from socket import AF_INET
try:
from gpiozero.pins.data import pi_info
except ImportError:
raise ImportError("This doesn't appear to be a Raspberry Pi device!")
import psutil
from lcd1602 import LCD_LINE_1, LCD_LINE_2, lcd_init, lcd_string, lcd_cleanup
PI_BOARD_INFO = pi_info()
BOOT_TIME = psutil.boot_time()
DATETIME_BOOT_TIME = datetime.datetime(*time.localtime(BOOT_TIME)[:6])
def size_human_readable(int_size):
""" 返回人类可读的文件大小 """
if int_size < 1024:
return "%sB" % (int_size, )
if int_size < 1024 * 1024:
return "%0.1fK" % (int_size / 1024, )
if int_size < 1024 * 1024 * 1024:
return "%0.1fM" % (int_size / 1024 / 1024, )
return "%0.1fG" % (int_size / 1024 / 1024 / 1024, )
def get_cpu_temp():
# return psutil.sensors_temperatures()["cpu_thermal"][0].current
with open('/sys/class/thermal/thermal_zone0/temp', 'r') as f:
return int(f.read()) / 1000
def get_hostname():
with open('/etc/hostname', 'r') as f:
return f.read().strip()
def get_kernel_name():
with open('/proc/version', 'r') as f:
return f.read().strip().split(' ')[2]
def get_bootloader_version():
rc, output = subprocess.getstatusoutput('vcgencmd bootloader_version')
if rc != 0:
return "Unknown"
return output.splitlines()[0]
def get_ips():
ips_list = []
for iface_name, iface_info in psutil.net_if_addrs().items():
for item in iface_info:
if item.family is AF_INET:
iface_addr = item.address
break
else:
iface_addr = "No ip addr"
ips_list.append((iface_name, iface_addr))
return ips_list
def get_partitions_info():
partitions_info = []
for partition in psutil.disk_partitions():
partition_mountpoint = partition.mountpoint
partition_usage = psutil.disk_usage(partition.mountpoint)
partitions_info.append(
# mount point, total, percent
(partition_mountpoint, size_human_readable(partition_usage.total), partition_usage.percent)
)
return partitions_info
def get_boot_time_delta() -> datetime.timedelta:
return datetime.datetime(*time.localtime(time.time())[:6]) - DATETIME_BOOT_TIME
def print_boot_time_delta(timedelta: datetime.timedelta):
time_delta_seconds = timedelta.seconds
time_delta_days = timedelta.days if timedelta.days <= 999 else 999
return "%sd %sh %sm %ss" % (
str(time_delta_days).rjust(3),
str(int(time_delta_seconds // 60 // 60)).zfill(2),
str(int(time_delta_seconds // 60 % 60)).zfill(2),
str(int(time_delta_seconds % 60)).zfill(2),
)
KERNEL_NAME = get_kernel_name()
RAM_TOTAL_HUMAN_READABLE = size_human_readable(psutil.virtual_memory().total)
BOOTLOADER_VERSION = get_bootloader_version()
def main():
lcd_init()
# 显示所有字符(0x00~0xff)
for i in [[0x10*i, 0x10*(i+1)] for i in range(0x00, 0x0f+1, 2)]:
sl_1 = "".join([chr(j) for j in range(i[0], i[0]+16)])
sl_2 = "".join([chr(j) for j in range(i[1], i[1]+16)])
lcd_string(sl_1, LCD_LINE_1)
lcd_string(sl_2, LCD_LINE_2)
time.sleep(0.75)
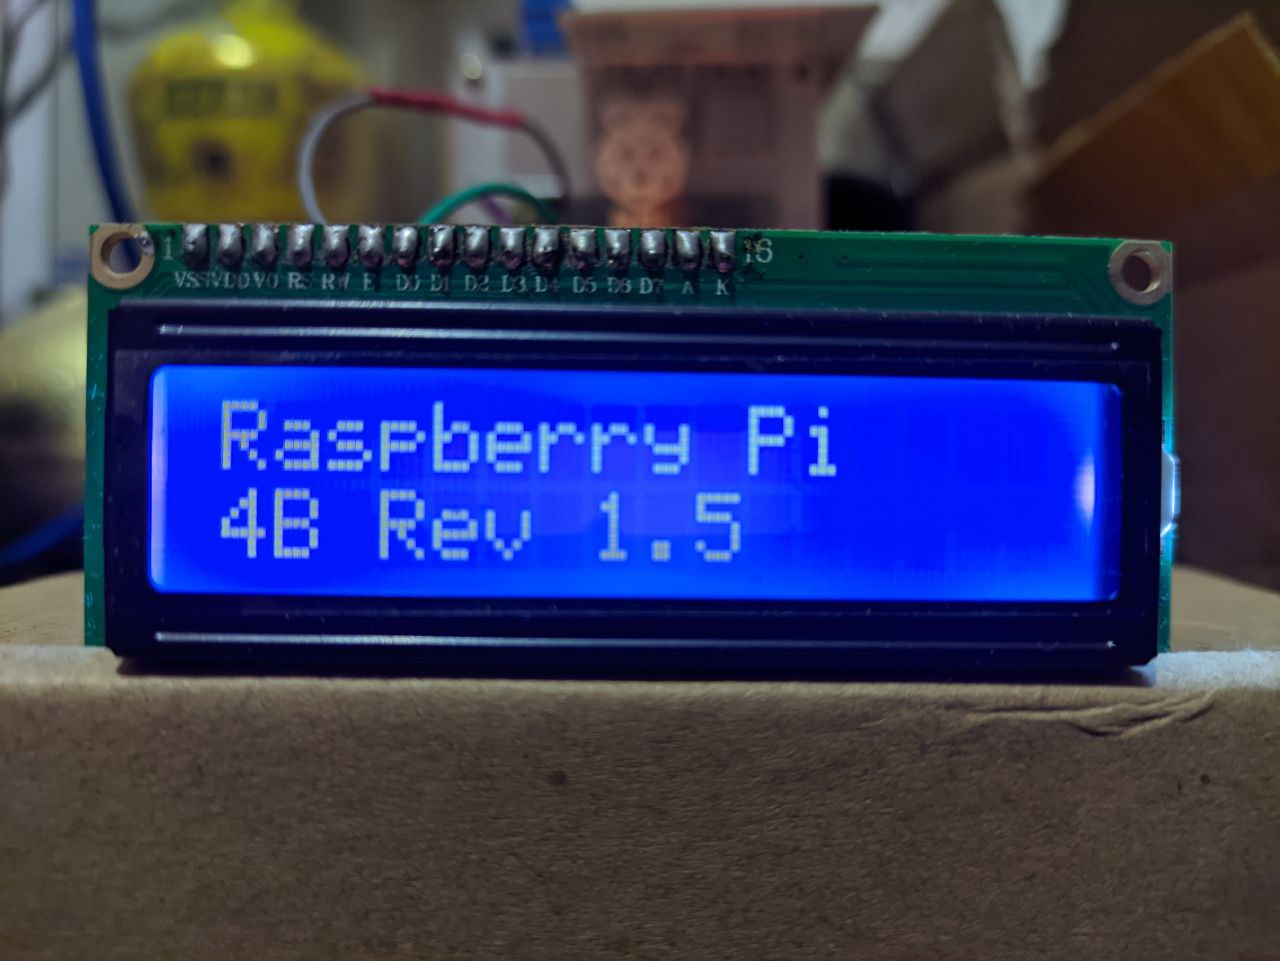
# 显示设备型号, 修订版本, 制造厂商, Bootloader版本, 内核版本等信息
# 只显示一次, 不循环显示
lcd_string("Raspberry Pi", LCD_LINE_1)
lcd_string("%s Rev %s" % (PI_BOARD_INFO.model, PI_BOARD_INFO.pcb_revision), LCD_LINE_2, scrolling=True)
time.sleep(3)
lcd_string("Revision:", LCD_LINE_1)
lcd_string(PI_BOARD_INFO.revision, LCD_LINE_2, scrolling=True)
time.sleep(3)
lcd_string("Released:", LCD_LINE_1)
lcd_string(PI_BOARD_INFO.released, LCD_LINE_2, scrolling=True)
time.sleep(3)
lcd_string("Manufacturer:", LCD_LINE_1)
lcd_string(PI_BOARD_INFO.manufacturer, LCD_LINE_2, scrolling=True)
time.sleep(3)
lcd_string("Bootloader ver:", LCD_LINE_1)
lcd_string(BOOTLOADER_VERSION, LCD_LINE_2, scrolling=True)
time.sleep(3)
lcd_string("Kernel:", LCD_LINE_1)
lcd_string(KERNEL_NAME, LCD_LINE_2, scrolling=True)
time.sleep(3)
# 循环显示
while True:
# 显示当前时间
datetime_now = datetime.datetime.now()
lcd_string(datetime_now.strftime("%Y-%m-%d %a"), LCD_LINE_1)
for _ in range(5):
if (datetime_now.hour, datetime_now.minute, datetime_now.second) == (0, 0, 0):
lcd_string(datetime_now.strftime("%Y-%m-%d %a"), LCD_LINE_1)
lcd_string(datetime_now.strftime(" %I:%M:%S %p"), LCD_LINE_2)
datetime_now += datetime.timedelta(seconds=1)
time.sleep(1)
# 显示CPU综合占用率和温度
for _ in range(5):
lcd_string("CPU used: %0.1f%%" % psutil.cpu_percent(), LCD_LINE_1)
# chr(0xdf) == '°'
lcd_string("CPU temp: %0.1f" % get_cpu_temp() + chr(0xdf) + "C", LCD_LINE_2)
time.sleep(1)
# 显示RAM占用情况
lcd_string("RAM total: %s" % RAM_TOTAL_HUMAN_READABLE, LCD_LINE_1)
for _ in range(3):
lcd_string("RAM used: %s" % size_human_readable(psutil.virtual_memory().used), LCD_LINE_2)
time.sleep(1)
for _ in range(3):
lcd_string("RAM used: %0.1f%%" % psutil.virtual_memory().percent, LCD_LINE_2)
time.sleep(1)
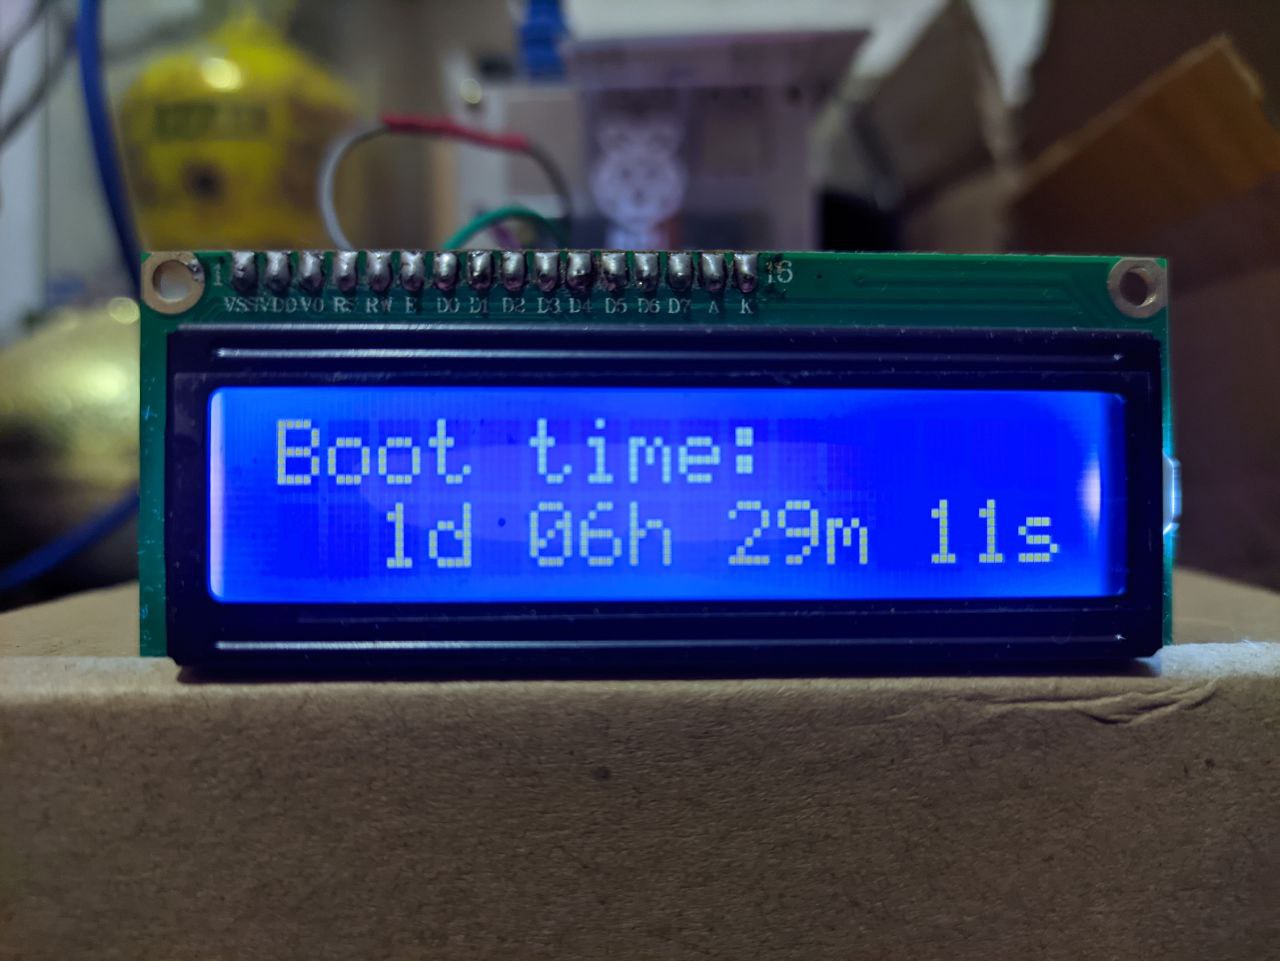
# 显示开机时长
boot_time_delta = get_boot_time_delta()
for i in range(5):
lcd_string("Boot time:", LCD_LINE_1)
lcd_string(
print_boot_time_delta(boot_time_delta + datetime.timedelta(seconds=i)), LCD_LINE_2
)
time.sleep(1)
# 显示磁盘各分区占用情况
for mount_point, total_size, used_percent in get_partitions_info():
lcd_string("Mount: " + mount_point, LCD_LINE_1)
lcd_string("Total: " + total_size, LCD_LINE_2)
time.sleep(3)
lcd_string(" Used: %0.1f%%" % used_percent, LCD_LINE_2)
time.sleep(3)
# 显示主机名
lcd_string("Hostname:", LCD_LINE_1)
lcd_string(get_hostname(), LCD_LINE_2, scrolling=True)
time.sleep(3)
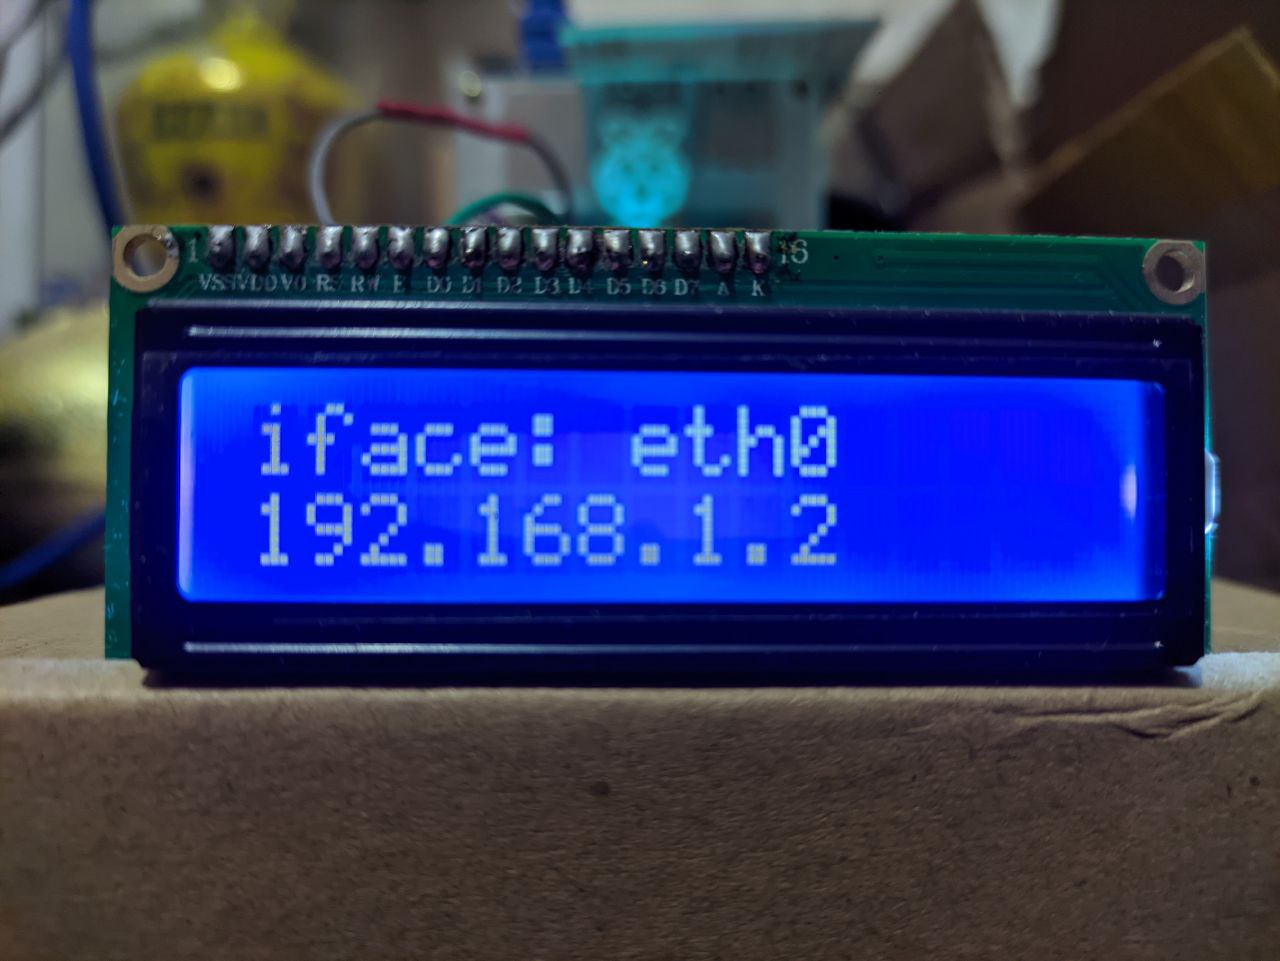
# 显示各个网卡设备的IP地址
for iface_name, ip_ in get_ips():
lcd_string("iface: " + iface_name, LCD_LINE_1)
lcd_string(ip_, LCD_LINE_2)
time.sleep(3)
if __name__ == '__main__':
try:
main()
finally:
lcd_cleanup()
以上程序源码全部开放在GitHub,喜欢的话不妨给个star。

最后,把写好的程序丢给supervisor,让它每次开机自动执行。
成果展示